Showing posts with label Holiday. Show all posts

Tuesday, January 17, 2012

Valentine's Day Ideas

This week has been exciting and crazy! Woven Home has been invited to sell our products at a local store, here in Lynchburg Va.  I will share more about this in a future post, but I have been cutting and sewing all day, everyday to make enough product for our display.  As therapy, in my down time I have been surfing Pinterest looking for Valentine's Day ideas, here are a couple of my favorites.....(all of these images can be found, and linked back to the original creator if you go to my pinterest page ((Rebekah Moody)) and look under Valentine's Day ideas)


These are just a few of the images I have found and loved this Valentine's Day season.  I think I will be running out to Michael's tomorrow morning to buy hearts and chalk board paint.

Rebekah

Thursday, January 12, 2012

New Years Eve Party

Free NYE Subway Art from Eighteen25
Out of necessity we had a New Years Eve Party this year.  I say necessity because we talked all of our friends into lining up babysitter and going with us to an awesome party at a resteraunt in town... only for the resteraunt to cancel their party last minute. 

We had less than a week from conception to party time so there was lots to do!


My recipe for a painless party…

  1. I LOVE invites.  I just like paper of all kinds.  But make or order something that is suitable to your party… whether, crazy fun or simple elegant.  I think it always sets the tone for a party.  While I normally do not send out Evites I had to this time… no time for paper since it was last minute… but it worked like a charm!  And I found an adorable chevron pattern to boot.
  1. Guest list.  How to put it nicely… we have lots of different genres of friends… like, I might not mix my college friends with my grandparents… just sayin!      

  1. PLAN AHEAD… Plan your food, drink, décor, etc.  I am a list maker by nature which always helps things go a little smoother.

  1.  Enlist help and be able to delegate.  Whether it’s your husband making the play list and setting up the bar, or your sister sweeping up and garnishing your dishes.  It makes all the difference in the world.   You might even want to make a secret list of what you may or may not ask others to do (BUT, if your sister finds it, she will roll her eyes at youJ)
Above mentioned sister... who retired to her PJ's early... she's saying "I found that secret list, you are so OCD!"  Kidding!  I'm sure we were just gossiping!

  1. Get done what you can the day before.  Have your groceries, get out your serving pieces, house clean, buy flowers and arrange, etc.  If it can be done ahead… do it!

  1. Get those lists out and follow thru.  Cook, decorate, etc.  LEAVE TIME TO GET YOURSELF READY!  I like to have my hair and make-up done early in the day and throw on my clothes at the last minute!

 My favorite decor item... my breakfast room chandelier!  I have been wanting to try this for a while and this seemed like the right time.  The greenery and crystals were already in the chandelier from Christmas.  I added the clear glass ornaments with a little hot glue to be safe!  A little water, a few roses and some babies breath.  Whalla!!  I loved it, although it seemed more suitable for a wedding shower... it was still fun to do!


I forgot one thing...party favors and Champagne!  Crutial for a NYE Party!  Dont hate on my favors... this is what you get when you go to buy them at 4:30 on New Years Eve!


Here's to the greatest 2012 you can dream up!!

Kandi

Tuesday, January 10, 2012

Canvas Heart Garland

I am so excited to share this post with y'all.  (Okay I wrote y'all and I am from Wisconsin, but living in Virginia, and being married to a man from Mississippi definately has a way of changing one's speach.)  I thought about writing you, but if I was talking to you, I would have said y'all.....so there you go....


As y'all know I am working on my mudroom, and it is almost finished.  The painting is done....and I am waiting for my contractor to help me with a couple of projects before I can show you the finished product. 


So I started decorating for Valentine's Day....hope you enjoy!


Heart Garland, and Canvas Wreath

I used a heavy linen for my hearts.  I cut two identical hearts, and sewed them together, leave an opening so you can stuff it with a poly fill.  Sew the opening closed.  I sewed a little ribbon hanger at the top of each heart.  Finally I put my hearts in the washing machine...easiest way to fringe the edges.

The garland and wreath on the wall were made from torn pieces of painters canvas drop cloths. You can purchase these at any hardware store.  For the wreath, I used a metal wreath form, and for the garland I cut a clothes line to my desired length.  Rip 1" wide strips from end to end from you canvas.  Then cut so your strips are appoximately 1" wide by 8" long.  Tie the canvas strip to the wreath form or line.  Repeat a million more times!  It is easy, but monotomous.


Happy Decorating!
Rebekah
p.s. my hearts are two different sizes....


Friday, December 23, 2011

Around the house

Today has been a crazy day around here.  Mainly because my husband and I had very different plans.  I planned to finish up last minute Christmas dealings outside of the house WITHOUT children... meaning he would need to be home.  His plan... play golf...  Since his included "clients" I lost.  So, instead of staring at my list of things I need to finish up buying before the big day I decided to do a little post from around my house.

This year my decor included a fair bit of DIY but I stayed very traditional in color, sticking to red, green, and gold in my living room.
 
My tree decorating recipe. 

1. Lights.  Push some in deep to the tree and some wrapped further out around the tips.  And, in my opinion, you can never have too many!

2.  Garlands.  I use two types.  A small beaded garland and also a giant spool of gold mesh.  I get mine at Sam's and for around $10 a roll I think it has big impact.  You just wind and twist it as you go.

3.  Layer in your biggest ornaments.  I like to put my biggest deep into the tree.

4.  Call in the kids!  Let them help with putting all the rest of the ornaments.  I have some pretty, some hand me down, lots made by my kids, and all shapes and sizes.  You can't go wrong here.

5.  Finally, I stick in picks.  Mine are always glittered for the main tree.  Curly, berries, and flowers.  Fills in all your gaps.

6.  Add presents!  Trees always look better to me with presents stacked under it.  There have even been times when I wrap empty boxes just to add to it!

My mantle this year includes lots of greenery from my yard.  A little tip, if your yard doesn't have tree suitable for cuttings you can stop at a Christmas tree lot.  They always have huge piles of limbs they have cut off of other peoples trees and they are happy to let you take them free of charge!  With mantles I think the key is always to layer, layer, layer!  Layer textures, colors, and height. 
You've got to love where "Cobbie Face"  our Elf On The Shelf ended up today. 

These topiary trees are incredibly easy to make.  All you need is a paper mache come and some yarn or twine.  Wrap around cone making sure you fill in all gaps and glue the ends in.  That simple!  I put mine on brass candle stick to help vary the height and to add another brass element to tie into my stocking holders.  Greenery and holly berries from the yard, a little sparkle, and that's it!

A few other little vignettes.
Footed Milk Glass Pedestal plus vintage ornaments.

Willow Tree Nativity... after all... this is what its all about!


Merry Christmas!!
Kandi

Sunday, November 27, 2011

Transitioning from Thanksgiving to Christmas

It has been so crazy around my home these past few weeks, that I am getting a little bit of a late start on my transition from Thanksgiving to Christmas.  Many of you reading this post have finished decorating.  My mother is one of you!  I wish I could be that together.  This year has been particularly crazy because we had a booth at the Liberty Winter Market.  I feel like I have been at my sewing machine for the past two months trying to create inventory for our booth.  Now that the market is over I can finally relax and focus on my home.  So here are a few of my inspirations from Pinterest..... 
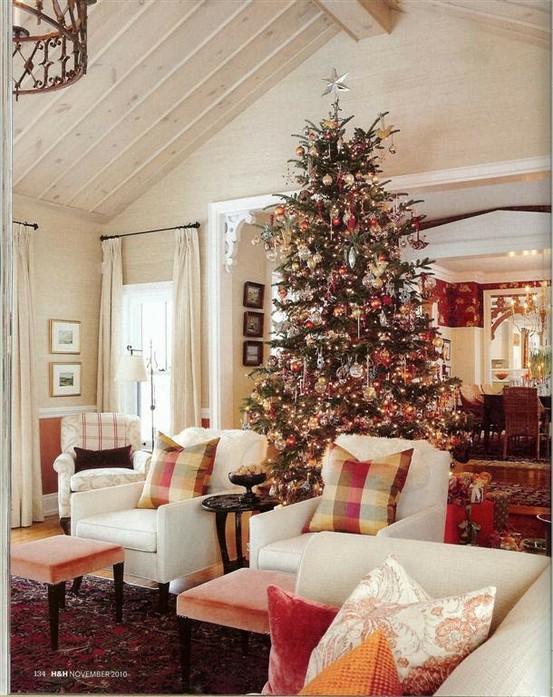
                                          This picture is from Sarah Richardson's farmhouse. 

Here are a couple of images from my house, I have to apologies for the poor picture quality, I snapped these photos with my iphone this morning.  I am having a hard time taking down my paper bag flowers from Thanksgiving, they are just so simple, and beautiful.  As I said in my last post there is a tutorial on these flowers on 52 mantels.  Instead of folding the four pieces of paper together, I folded the paper individually, and cut of the corners.  Then I hot glued the edges together to create a continuous circle. 


        Vintage Chrismas Ornaments in silver, gold and white complete the transition.


Isn't the sunrise beautiful...this was not planned!  I just bought this planter from Estate Specialist last week, it was only $12!  I just love how chippy it is.  The roses are leftover from Thanksgiving dinner.  I hope your Christmas decorating is going well, and you are enjoying this holiday season!
love,
Rebekah


Thursday, November 24, 2011

Happy Thanksgiving from Lynchburg Va

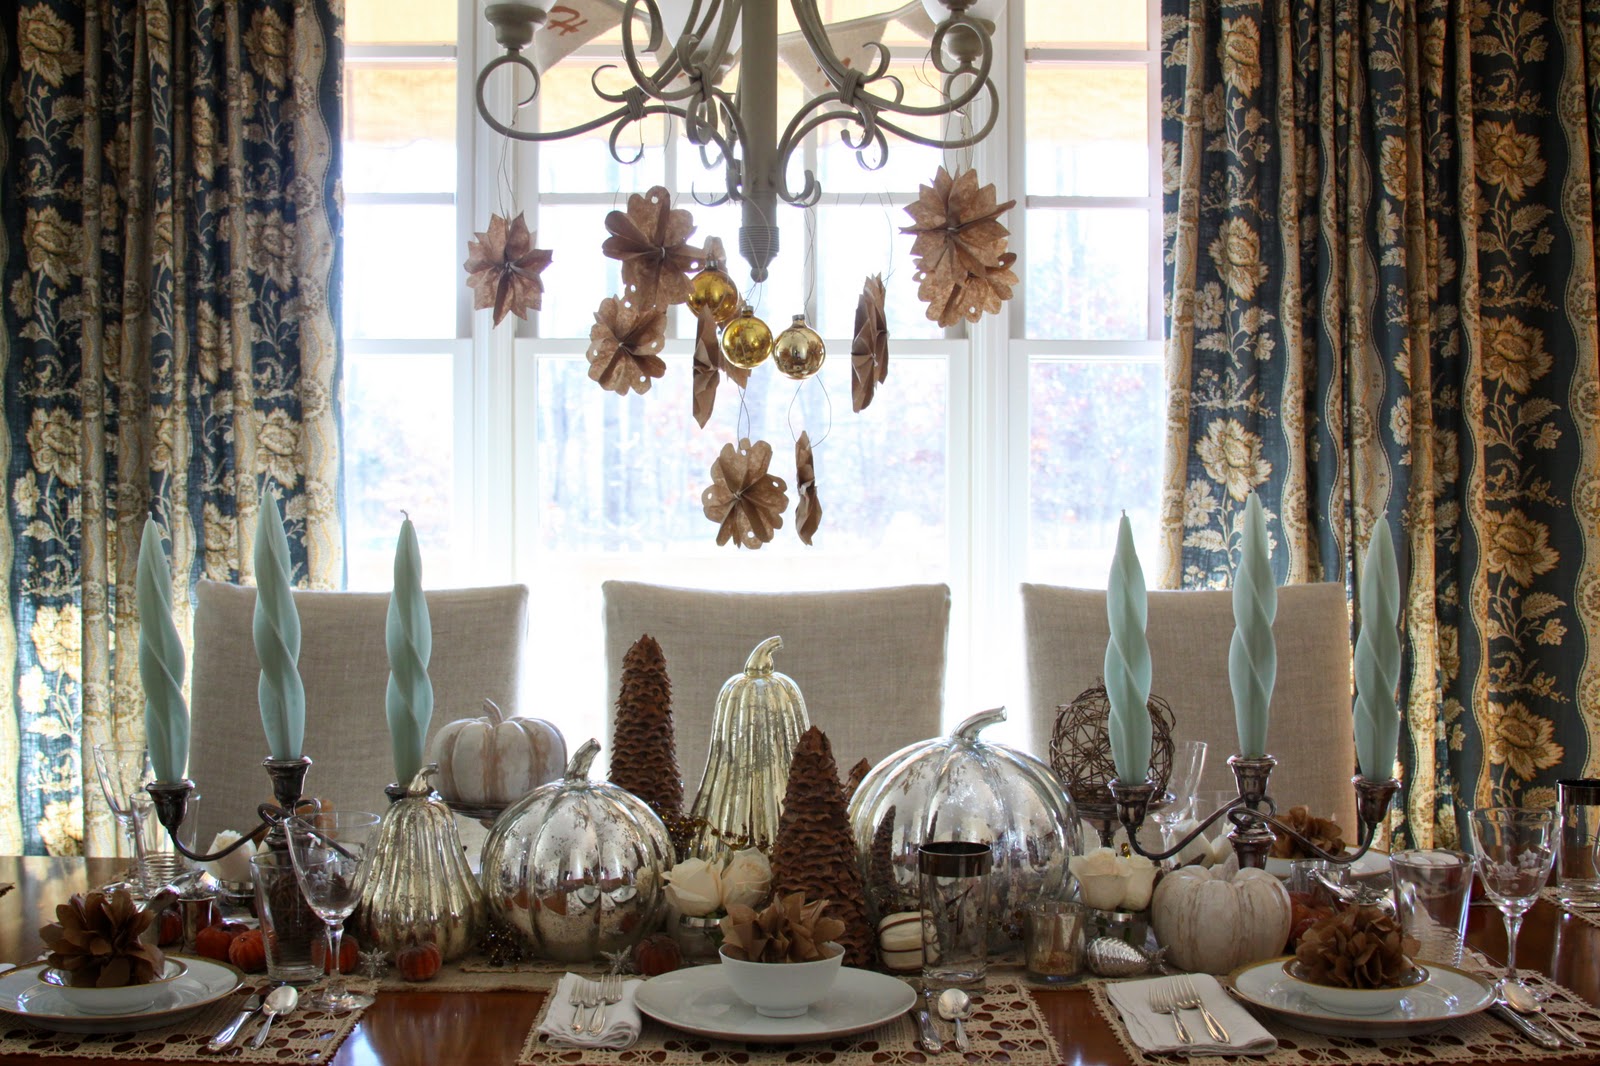
Happy Thanskgiving!  The turkey is in the oven, and our family is on its way.  Here are a couple of pictures of our tablescape this year.  The pumpkins are from Pottery Barn, the paper bag flowers were inspired by 52 Mantels from Pinterest, and the"Give Thanks" banner was one of my creations!  I know the pumpkins were a total splurge, but I compensated for them by making those beautiful homemade paper bag flowers and "Give Thanks" banner.  Every table needs a little glamor mixed with a good deal!  I do love this season...


I love these Pottery Barn Pumkins.  I have used them in several places around my home this fall....including the mantel.  The main thing to keep in mind when decorating a mantel or even your table, add height, depth, and texture in your design.


I like the combination of rustic and time warn treasures mixed with shimming glass. 
I hope your Thanksgiving was filled with friends and family, and lots of joyful moments!
love,
Rebekah
Related Posts Plugin for WordPress, Blogger...
 
Blog Design by Sweet Simplicity